
Simple 100% Whole Wheat Sourdough Bread – Fresh Milled Wheat
Fresh milled 100% whole wheat sourdough bread is a power packed superfood. This superfood has the most amazing health benefits. Bread is life and we should all be eating it, minus those with celiacs disease.
Wheat Is A Superfood
You might be surprised to learn that whole wheat sourdough bread is actually a superfood. For over a decade Americans have been told that wheat is bad; and going gluten-free will solve many of your problems. Gluten is only found in wheat. The problem with wheat is not wheat. It’s how man has processed wheat to extract all nutrients to provide a white substance with no nutritional value. White processed wheat is making us sick and it needs to be addressed.
Wheat, in its whole form, is amazing for your gut health! Wheat is full of amino acids that help your immune system, your heart health, brain health, and wheat is amazing for your skin! We need to accept wheat in its whole form and stop stripping it of it’s super powers.
Did you know that wheat contains 40 of the 44 essential nutrients you need to live a healthy life? It’s a powerhouse food!
Is Wheat GMO?
In America it is against the law to produce GMO wheat. Rest assured, wheat is not a GMO crop in the United States. I know many of you will say that it’s shorter than traditional wheat, and you are right. That doesn’t make wheat a bad guy. Simply put, wheat has been crossbreed to create a better yielding crop and the nutrients are still there.
It’s like a farmer crossing 2 types of apples together to create a new variety. There is nothing wrong with it when you think of it that way, and the same goes for wheat. Instead of thinking that wheat is bad, consider all the possibilities with wheat and introduce it back into your life through its whole form.
TO PURCHASE THE SAME WHEAT I BUY, VISIT AZURE STANDARD AND BUY HARD WHITE WHEAT BERRIES. TAP THIS LINK
Fresh Milled Wheat
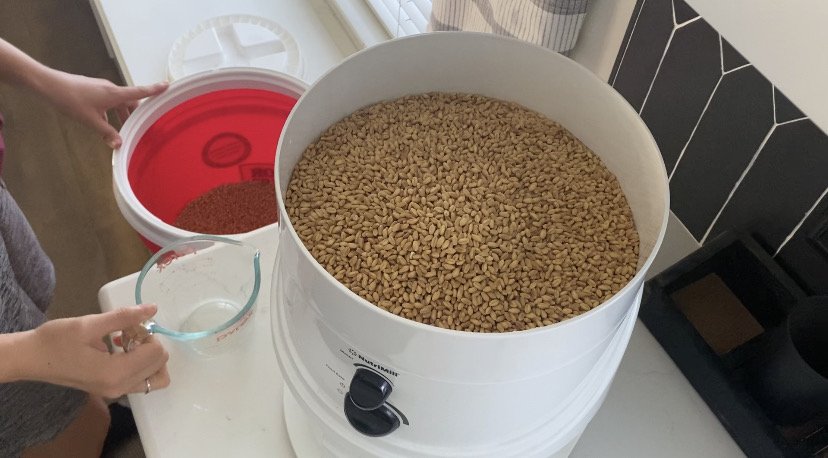
The key to getting all the benefits of wheat is to freshly mill the wheat berries yourself and to use it unsifted. It’s important to have a wheat grinder in your home. Every home should own a wheat grinder.
Fresh milled whole wheat is best as soon as it has been ground. Many nutrients are lost as the wheat flour sits on the counter, but there is no clear time line. Think of an apple. Once the apple is cut it starts to turn brown. Same process with the wheat flour, but maybe not as quickly.
I try to make sure I use up the flour I have ground within 3 days. If I have left over flour from making bread, I use it to feed to my sourdough starter.
Just remember, the flour you buy in the store has a crazy long shelf life. That is because they have stripped the flour of oils and germ. This prevents it from spoiling. All of those key nutrients are in the oil and germ. We need to stop the over use of white flour and get back to the basics with whole wheat sourdough bread.
First Make A Sourdough Starter
In order to make whole wheat sourdough bread, you first need a sourdough starter. I have a step by step blog post and video explaining the wonderful process! Check HERE for all the information to get started.
How To Make Fresh Milled Wheat Sourdough Bread
To make whole wheat sourdough bread we just need 4 ingredients:
- fresh milled wheat flour
- water
- salt
- sourdough starter
This is by far the cheapest food we can make for our family and the healthiest too, in my opinion of course. Now it’s time to make the bread. Let me share with you this easy process. It’s going to look like a lot of steps, but it’s repetitive and easy to do.
- STEP 1: Grind your wheat berries into flour.
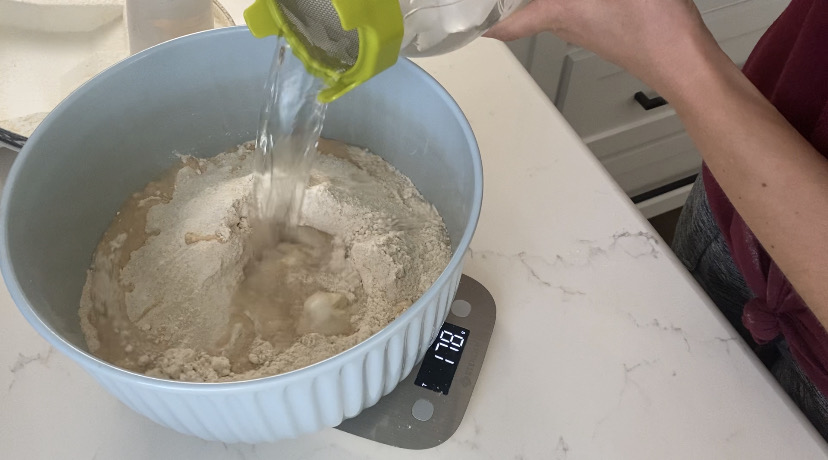
- STEP 2: Mix warm fresh milled flour with ice cold water.
- STEP 3: Place a damp linen napkin over the bowl and let the dough sit for 1 hour.
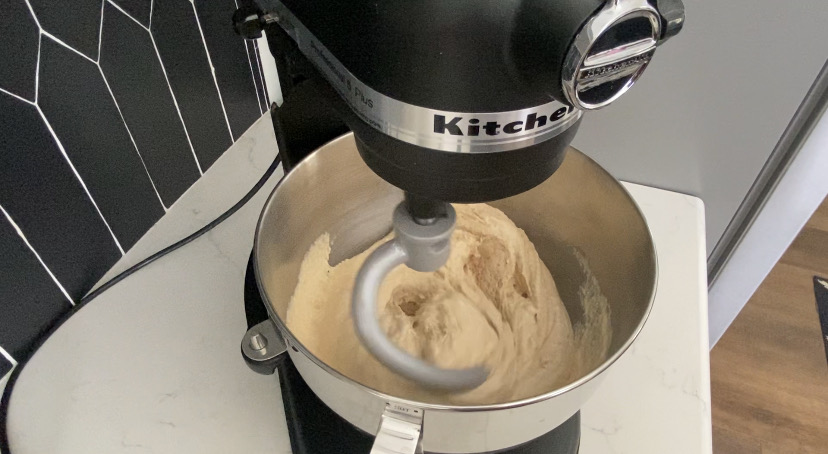
- STEP 4: (optional) Add dough to KitchenAid mixer.
- STEP 5: Add salt and sourdough starter to mixing bowl with dough.
- STEP 6: Use a dough hook and mix dough with salt and starter for 2-3 minutes. (this can be done by hand)
- STEP 7: Add dough back to original mixing bowl. I do not recommend making sourdough bread in a stainless steel bowl because it can manipulate the temperature of the bowl as it ferments.
- STEP 8: Do the first stretch and fold. Cover with damp towel. Rest for 1 hour.
- STEP 9: Repeat the stretch and fold, sit for 1 hour, 6 times if you can. 2-4 times at least.
- STEP 10: After the last stretch and fold, use a bend scraper to place the dough on a damp work surface. Get your hands wet to work with the dough.
- STEP 11: Cut the dough in half.
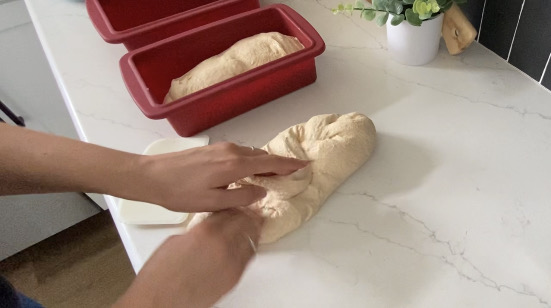
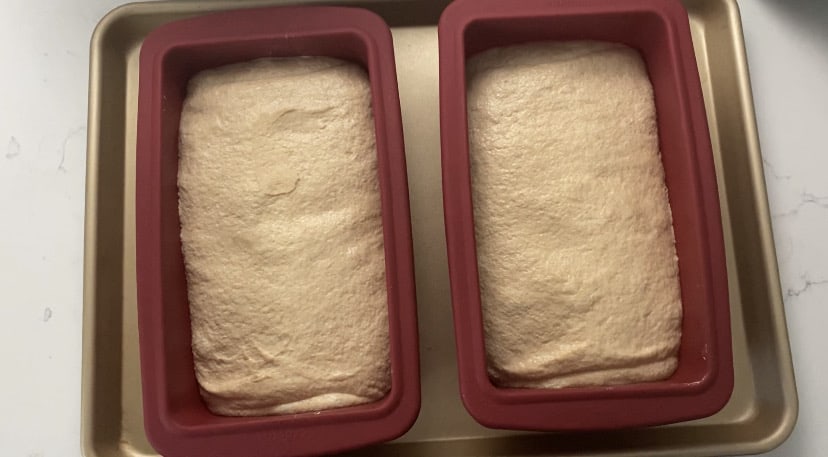
- STEP 12: Braid each half of dough and roll them up into a (2) loaf shapes. Place each loaf into a silicone loaf pan.
- STEP 13: Let the dough rest for 1 hour with a damp linen napkin over the top.
- STEP 14: Place a stainless steel pan filled with water (half full) on the lower rack of your oven.
- STEP 15: Bake the bread in a 400 degree oven for 10 minutes, then lower heat to 375 degrees and bake an additional 30 minutes.
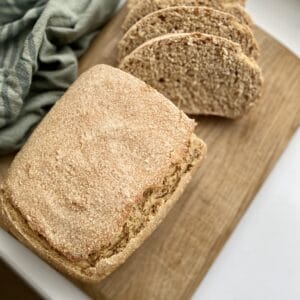
Simple 100% Whole Wheat Sourdough Bread Using Fresh Milled Wheat
Ingredients
- 1000 grams fresh milled wheat flour
- 800 grams ice cold water
- 260 grams active sourdough starter
- 2 tsp. salt
Instructions
- First, you need an active sourdough starter. Make sure your starter has been fed 6-10 hours prior to making sourdough bread.
- Grind 4-5 cups of hard white wheat berries to make a fine flour. The flour will be warm. Measure out 1000 grams of wheat flour into a large bowl.
- Add 800 grams of ice cold water to the flour.
- Mix the flour and water together. Just mix until all the flour is incorporated.
- Place a damp linen napkin over the bowl and let it sit for 1 hour.
- After 1 hour, you have 2 choices.A. Either mix the salt and sourdough starter into the dough by hand for 5 minutes.ORB. Dump your dough into a KitchenAid mixing bowl, then measure out your starter and salt into the mixing bowl. (My favorite method) Place the dough hook into the bowl and mix, on the lowest setting, for 2-3 minutes.
- From here on out, we will NOT USE FLOUR AT ALL, ONLY WATER when working with the dough.
- Get your hands wet and glide the dough off the dough hook. Using a bench scraper, place the dough back into your original mixing bowl. You do not want your sourdough dough to sit in a stainless steel bowl when fermenting. Stainless steel will manipulate the temperature of the dough and could drastically effect the results of your bread.
- Get your hands wet again and do 4 stretch and folds. To do a stretch and fold: With a wet hand, scoop the NORTH side of your dough up and onto itself. Then, repeat the process on the WEST side, then SOUTH side, then EAST side of your bowl until all sides of the dough have been stretched up and folding over into the center of the bowl. (If you are confused, watch the video detailing how to do this.)
- After the 1st stretch and fold, place the damp linen napkin over the bowl and let it rest for 1 hour. Repeat this stretch and fold process 6 times throughout the day. 6 stretch and folds is best; however, if you are experiencing a busy day, try to at least accomplish 2-4 stretch and folds. No matter what the bread will turn out. The amount of stretch and folds will determine how light and airy your bread is once baked.
- Once the last stretch and fold is done and the dough has sat 1 more hour, use your bench scraper to scrape the dough onto a damp work surface. Remember we are only working with water now, no flour. Get your hands wet, and use your bench scraper to cut the dough in half.
- With wet hands it's time to braid the dough. Fold the top of the dough 1/4 of the way down, then pinch the top left side of the dough and pull it to the center, take the top right side of the down and pull it to the center. Repeat this process like a braid all the way down the dough overlapping the pinched dough on top of each other. (If this is confusing, refer to the video in this blog post for an example).
- At the base of the dough, start rolling the dough up like a cinnamon roll. Place the loaf of bread in your loaf pan and repeat the process with the other half of the sourdough. (I use silicone loaf pans. If you are using glass or stainless steel make sure you grease the pans or add parchment paper.)
- Place the damp linen napkin over the loaves of bread and let them rise for 1 hour.
- When 1 hour is almost up, preheat the oven to 400 degrees. Add a stainless steel pan, filled half way with water, to the bottom rack of your oven. This will create steam while the bread bakes and helps the bread to rise.
- Bake the bread for 10 minutes at 400 degrees, then lower the temperature to 375 degrees and bake for an additional 30 minutes.
- Allow the 2 loaves of bread to cool for 10 minutes on the counter before taking them out of the pan.
- Cool bread on a drying rack with a dry linen napkin draped over the top for at least 3-4 hours. Store bread in bread bags on the counter for 2 to 3 days. The refrigerator will dry out the bread. Bread can be frozen for up to 2 months.