
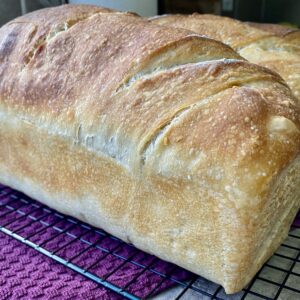
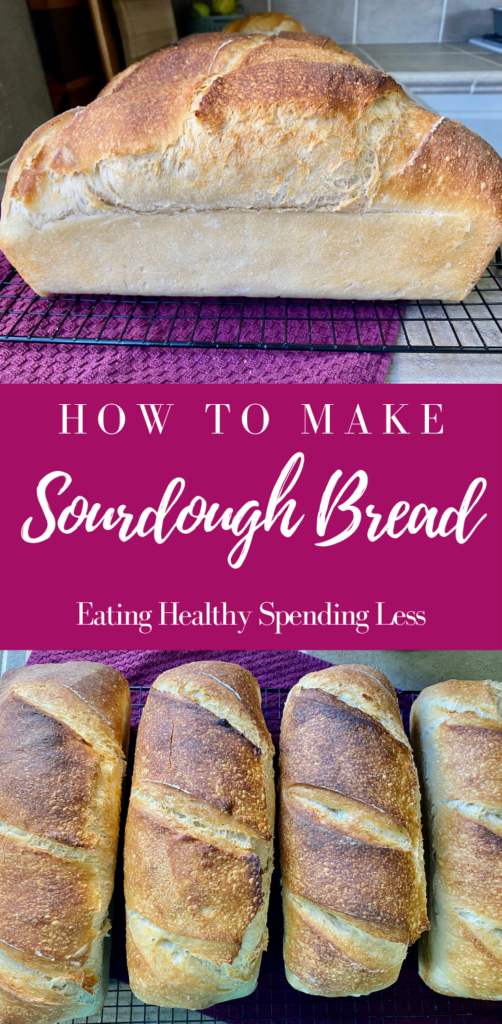
Sourdough Bread Recipe
Sourdough bread is one of the most luxurious breads you will ever eat. Sourdough bread is healthy. The process of making it does require a bit of work, but it is well worth it.
To begin the process of making sourdough bread, you need a sourdough starter. To learn how to make one, check out this post: Sourdough Starter Recipe. You will learn how easy it is to make a starter.
Gluten Sensitivity and Sourdough Bread
For 7 years my husband and I were gluten-free for different reasons. I was having very frustrating women issues and auto-immune issues, and my husband was struggling with gut health. We decided to try going gluten-free, and amazingly we saw results. Though they were not instant, we they did see results.
Being gluten free was okay for us, but it wasn’t our favorite. We felt like being gluten free was going to be apart of our lives forever, until last year. My friend Grace started sharing her journey with sourdough bread and its amazing benefits to gut health. I started paying close attention to what she had to say, and researching on my own how it could be.
Is Sourdough Bread Healthy?
Are you wondering, is sourdough bread healthy? If I have a gluten sensitivity, can I eat it? I can assure you that sourdough bread is healthy and has so many gut healthy benefits. During the fermentation process of making a sourdough starter the gluten breaks down making it more tolerable for gluten sensitive people to digest. My husband and I were so excited by the news, we decided to give it a try.
The first time we tried sourdough, we both had mild reactions. I had burning in my joints, and my husband instantly got a stuffy nose and stomach upset.

We tried again the following week, and we both had reactions again, but they were mild. Sourdough bread is healthy, and we wanted this to work. We continued increasing our intake of sourdough bread, and by the 4th week we both had zero reactions to sourdough bread!
Finally, we could eat wheat again! We were so excited to eat sourdough that I made bagels, donuts, English muffins, crackers, and of course bread. Sourdough is now apart of our everyday lives and we couldn’t be more excited. It’s definitely different than store bought sourdough bread, and requires some work, but it’s beyond worth it to us and our family.
What Kind Of Flour For Bread?
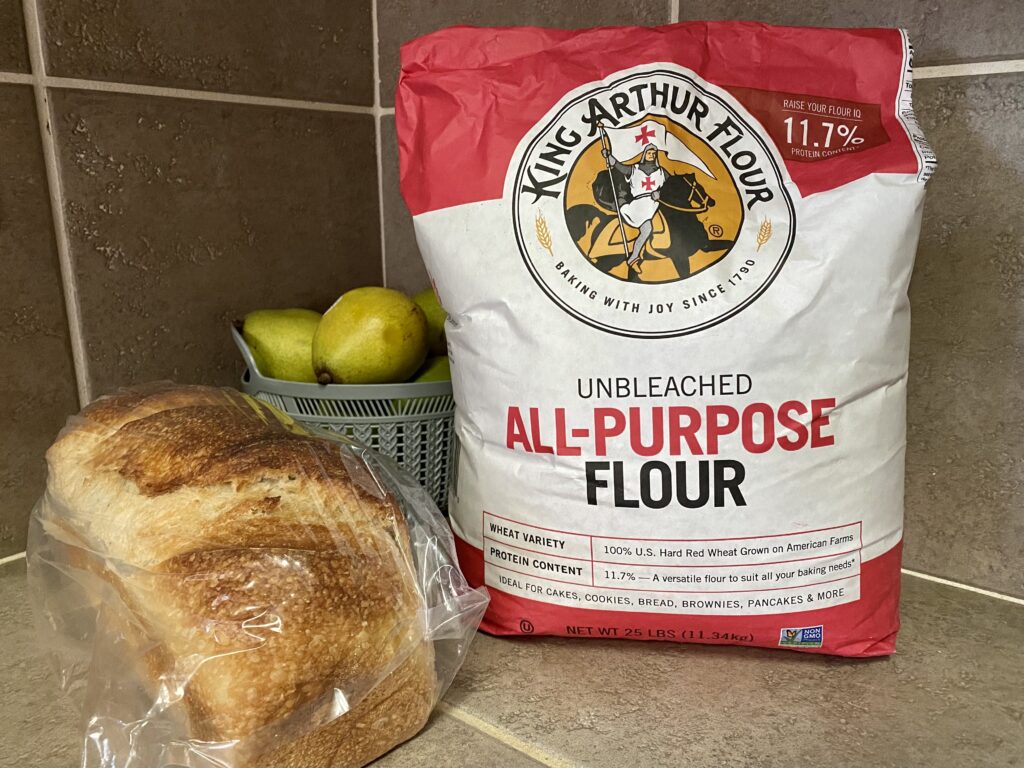
The type of water and flour you use to make sourdough bread is completely up to you. Since my husband and I had a gluten-sensitivity, I wanted to use a high quality flour with no additives. I chose to use King Arthur Unbleached All-Purpose Flour. There are only 2-ingredients: unbleached hard red wheat flour and malted barley flour. These flours are naturally white in color and really do make delicious breads.
I purchase one to two 25-pound bag monthly and pay $17.99 per bag. I also use this flour to feed my sourdough starter. You can technically mix your flours when feeding your starter and making bread, however, I choose to stick with this one flour.
How To Make Sourdough Bread
Having a sourdough starter is key to making sourdough bread. Once your starter is made and active, it’s time to make your first loaves of sourdough bread.
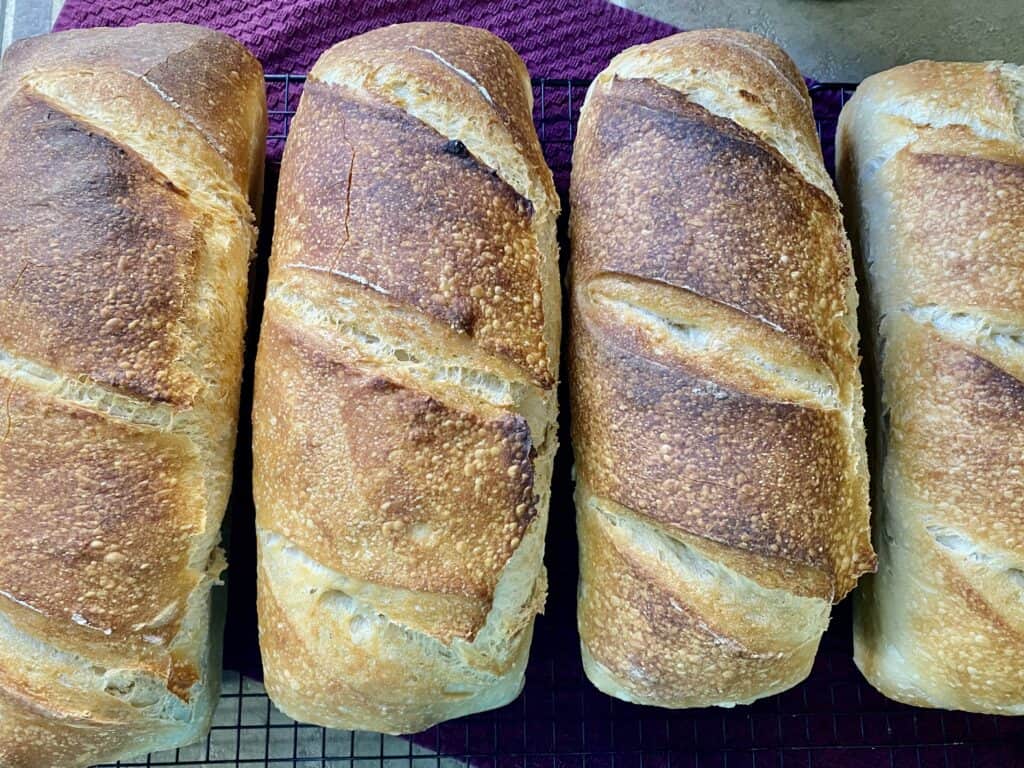
The ingredients amounts listed below makes 2 loaves of bread. Why make 1 loaf when you can make 2? I typically make 6 loaves of bread at a time, and freeze 3 loaves. We typically eat 1 whole loaf the day I bake bread. Remember, there are 6 of us in my home.
Sourdough Bread Ingredients:
- 320 grams sourdough starter
- 630 grams lukewarm water
- 1020 grams flour
- 24 grams salt
Sourdough Bread Instructions:
Place a large mixing bowl on a food scale. ZERO out the food scale.
Add your starter to the bowl. Be as close as you can to the required measurement. One gram over or under is okay. ZERO out the food scale.
Next, add the water. ZERO out the food scales. Add the flour. ZERO out the food scale.
Take the bowl off the food scale. (DO NOT ADD SALT YET).
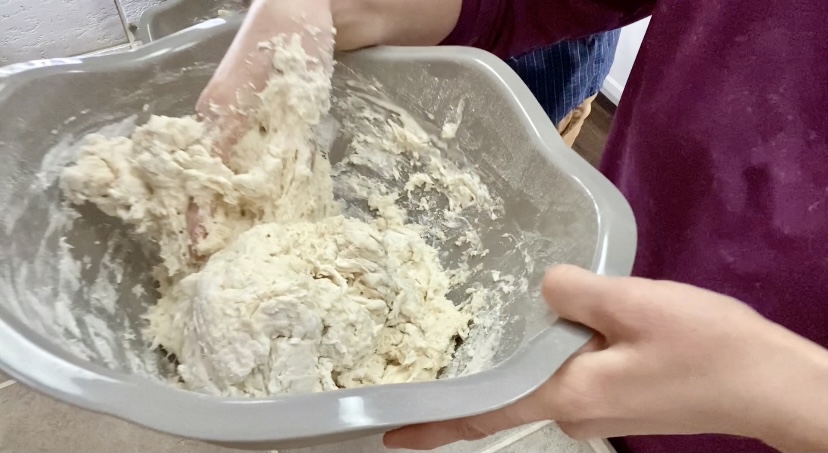
With your dominate hand, submerge your hand into the flour mixture and make swirling motions to incorporate the dough. This takes some time, to incorporate all the ingredients, so don’t worry. Keep wiping your hand around the bowl and underneath to incorporate all the flour.
If you hand gets too doughy, dip your other hand in water, then it’s easier to get all the dough off your dominate hand.
Next, once the flour is all incorporated, get a linen napkin or terry cloth towel totally wet, ring it completely out so it’s just damp, drape it over the bowl, and let the dough rest for 20 minutes.
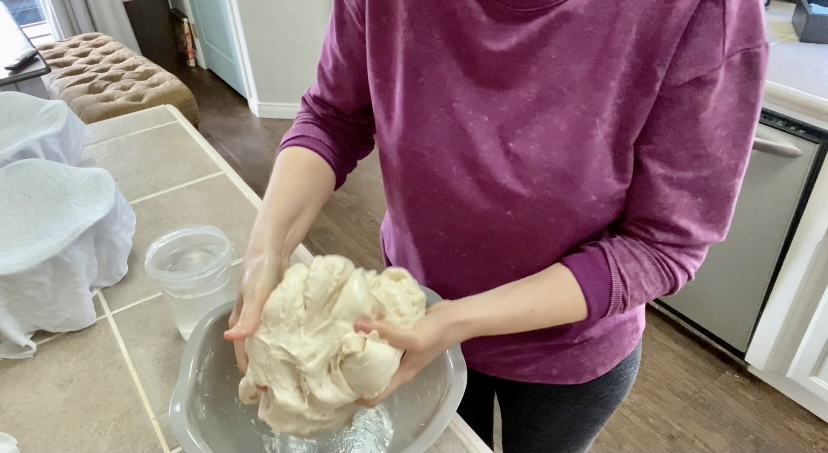
When the timer goes off, it’s time to add the salt with more water. Measure out the salt using your food scale, then sprinkle the salt all over the top of the dough. Fill a jar with water, the mouth of the jar should be wide enough for your hand (You will need to empty and rinse out the jar between each use).
Take 2 scoops of water with your hand and pour them over the dough. Make sure both hands are wet, and work the dough to incorporate all of the salt. You want the salt totally dissolved, then you know you’re done. If there’s a few pieces of salt, it’s okay. If the dough feels too dry, add a little more water to the dough. There is no exact measurement for this. It’s something you just need to feel. With practice you will get there.
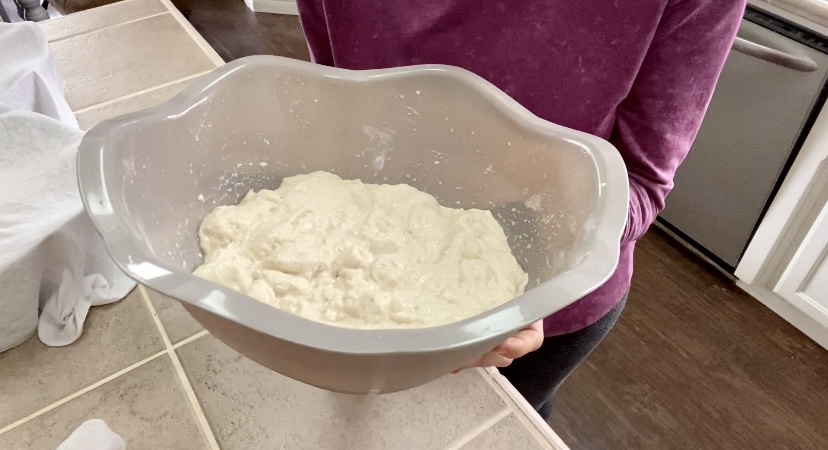
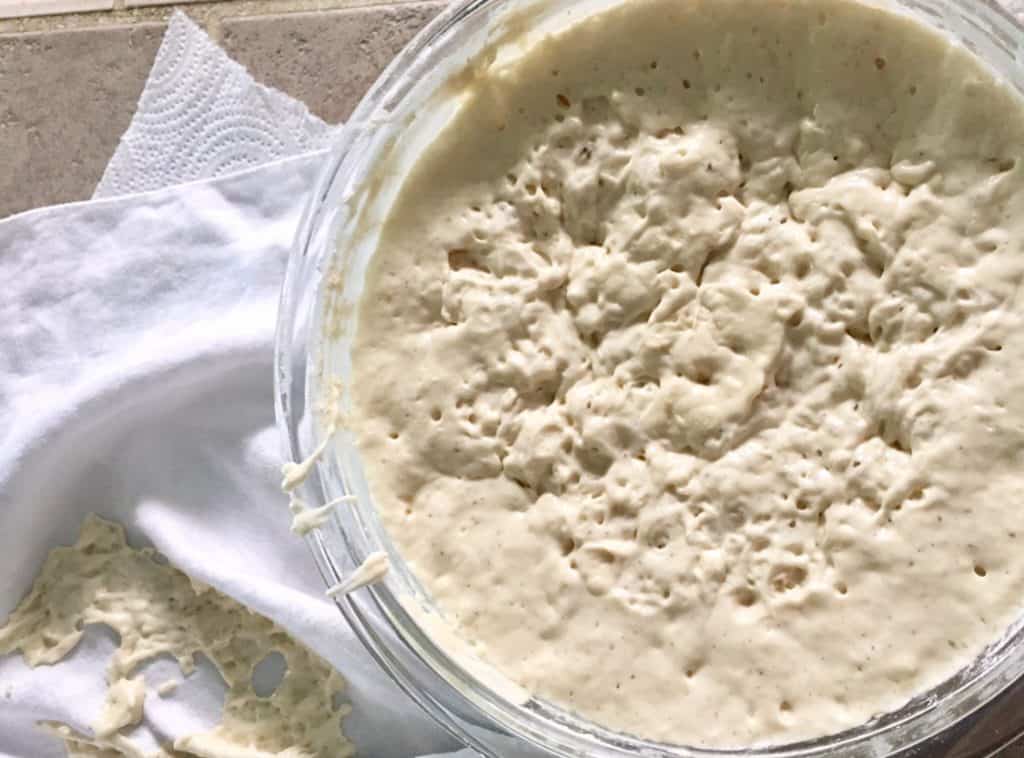
The dough should now look like cheese curds. Put the damp towel over the bowl again, and set the timer for 20 minutes.
Stretch and Folds
After the timer goes off, it’s now time to start your first round of STRETCH and FOLDS. There will be 4 rounds total of stretch and folds. These are quick and only require about 1 minute of your time.
Make sure there is fresh water in your jar, then dip your dominate hand inside the water. No scooping water, just get it wet.
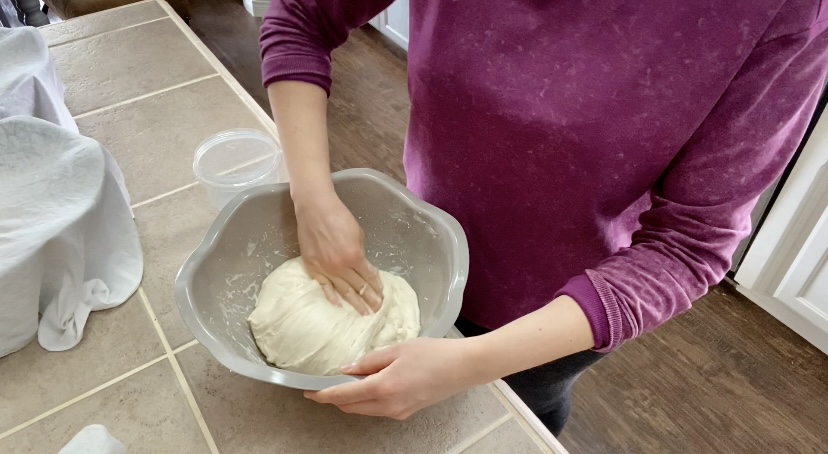
With your wet hand, you are going to start on the NORTH end of the bowl and work counter clockwise. Take your hand and scoop up some dough on the North end, and fold it into the center of the dough. Continue doing this all the way around the bowl. Generally it takes 4-5 stretch and folds to complete the whole bowl.
Once you have completed your first stretch and fold, set the timer for 40 minutes.
You will repeat this process a total of 4 times. If your towel starts to dry out, you may get it wet again, ring it out, and place over the bowl.
After the 4th stretch and fold let the dough rest again for 40 minutes.
Pre-Shaping The Dough
Now it’s time to move on to PRE-SHAPING.
First, we need to divide the dough. The dough itself should way around 2150 grams, give or take, minus the weight of your bowl. We need half of that. So roughly take 1070 grams of dough and place it on a floured surface. Use your bench scraper to help you.
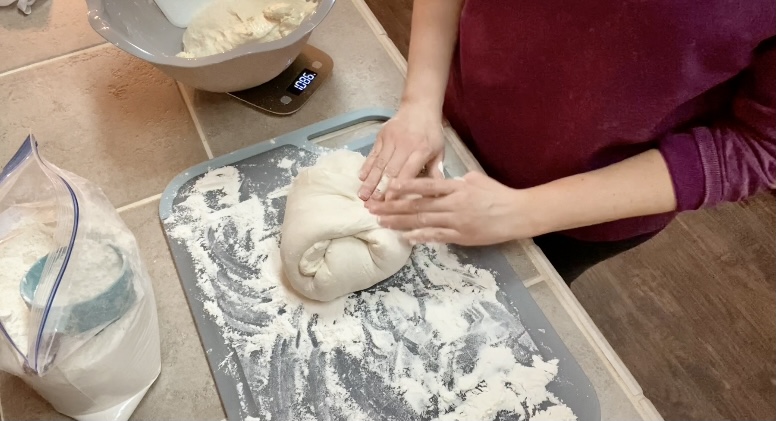
Starting from the North side, grab the dough and fold it into the center. Now take from the South side and fold that end of dough into the center. Now the sides, then the corners, always working from opposite sides.
Make sure the underside is floured, but do not flour the top side, or the pieces of dough will not stick to each other.
The goal now is to create tension on the under side. To do this you pick up the dough and place it on its side and tuck the dough under. Continue this process of tucking the dough all the way around. Now place the dough tucked side down, with the nice smooth side facing up.

Use your hands to turn the down in a circle cupping the dough with your hands and tucking any loose ends under. (SEE VIDEO FOR A VISUAL)
Repeat the process with the second half of the dough.
Place the damp towel over the 2 dough balls and let them rest for 20 minutes.
When the timer goes off, remove the towel. Using your bench scraper to assist you, and flip the dough over, so the smooth side is now facing down.
Final Shaping The Dough
It’s time for the FINAL SHAPING, and we’re almost done for the night!
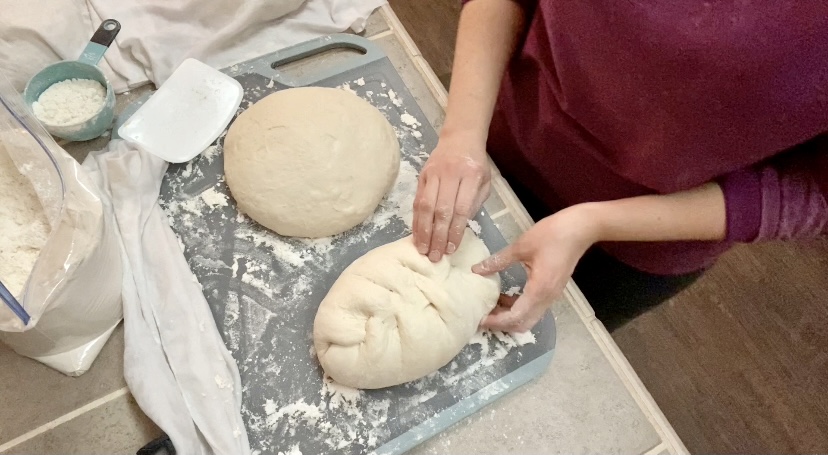
On the North side of the dough, fold down the top piece with your hands about 1/3 of the way down. We are going to now fishtail braid our bread. Take a piece from the left side and fold it into the center. Then, take a piece from the right side and overlap the first piece. Continue this process until you are down and the bottom.
Lightly flour your hands at anytime if it gets sticky.
Now it’s time to take the bottom piece and fold it up about 1/4 of the way, and roll the dough like a cinnamon roll. I like to roll it tightly and stretch it long to fit nicely in my extra-long loaf pans.
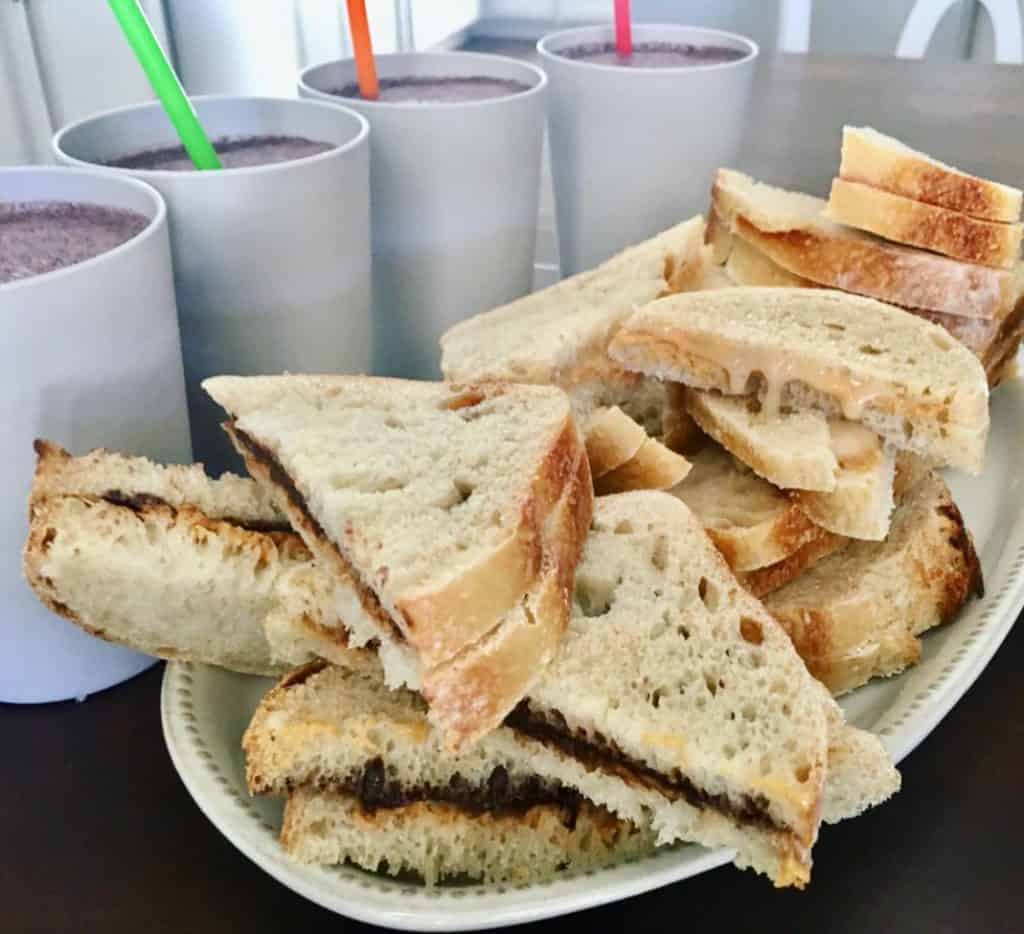
We use this bread for sandwiches, so I prefer zero big holes. So I roll the bread tightly.
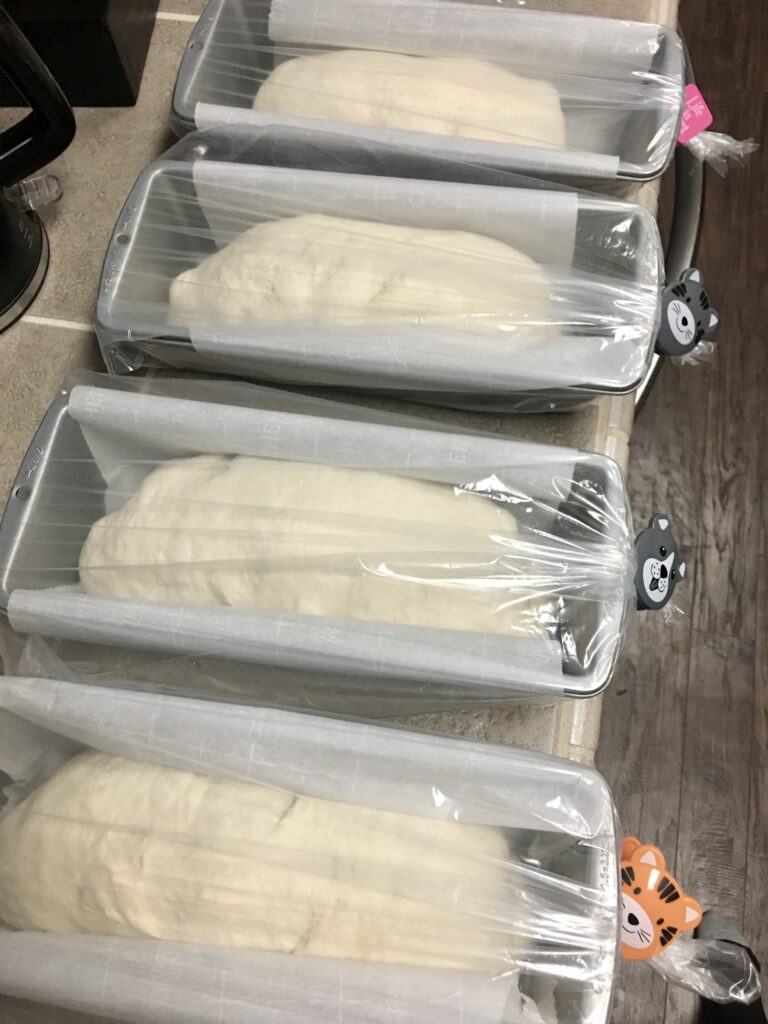
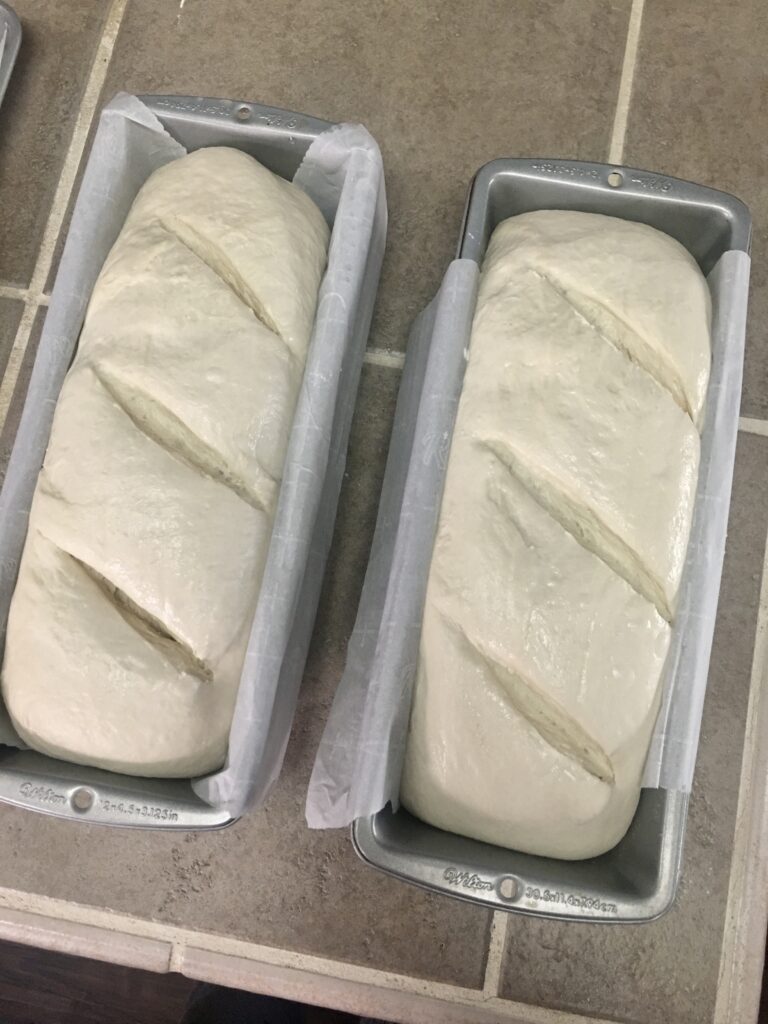
Now place your bread in your desired loaf pans. (If using metal pans, I recommend lining them with parchment paper.)
Put your loaves into bread bags, tie them off, and place the loaves in the refrigerator over night. At least 10-12 hours.
Time To Bake Sourdough Bread
The next morning, pull out the loaves from the refrigerator.
Preheat your oven to 500 degrees, and place a metal pan filled with water on the lower shelf of the oven.
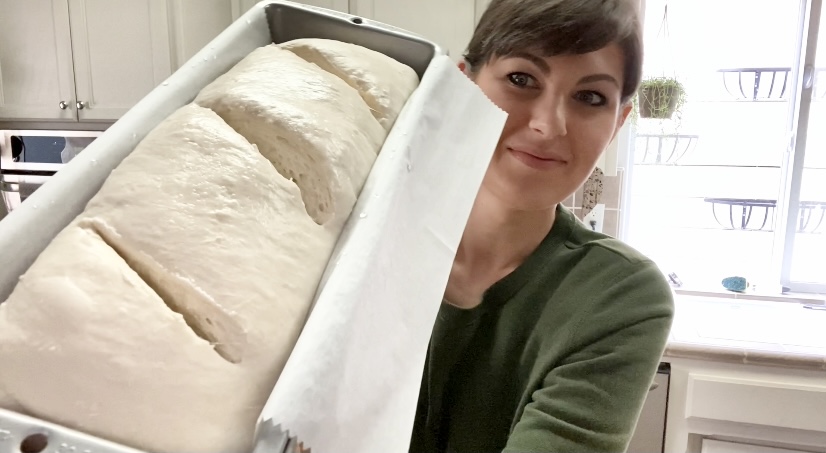
While your oven is preheating, you need to score the loaves of bread, or they will look like they exploded in the oven.
Take a sharp knife, lame, or x-acto knife, dip in flour, then run the knife over the dough in a diagonal line to the bread. I make a top, middle, and bottom slit into the dough. If you don’t run the knife over the whole width of the dough, it will bubble weird on the sides, so make sure to run it along the whole width. There are several ways of doing this process, and many designs you can make.
Once your oven is preheated, place your loaf pans in the oven and shut the door. Lower the oven temperature to 475 degrees, and set a timer for 20 minutes.
When the timer goes off, lower the temperature to 450 degrees and bake an additional 20 minutes.
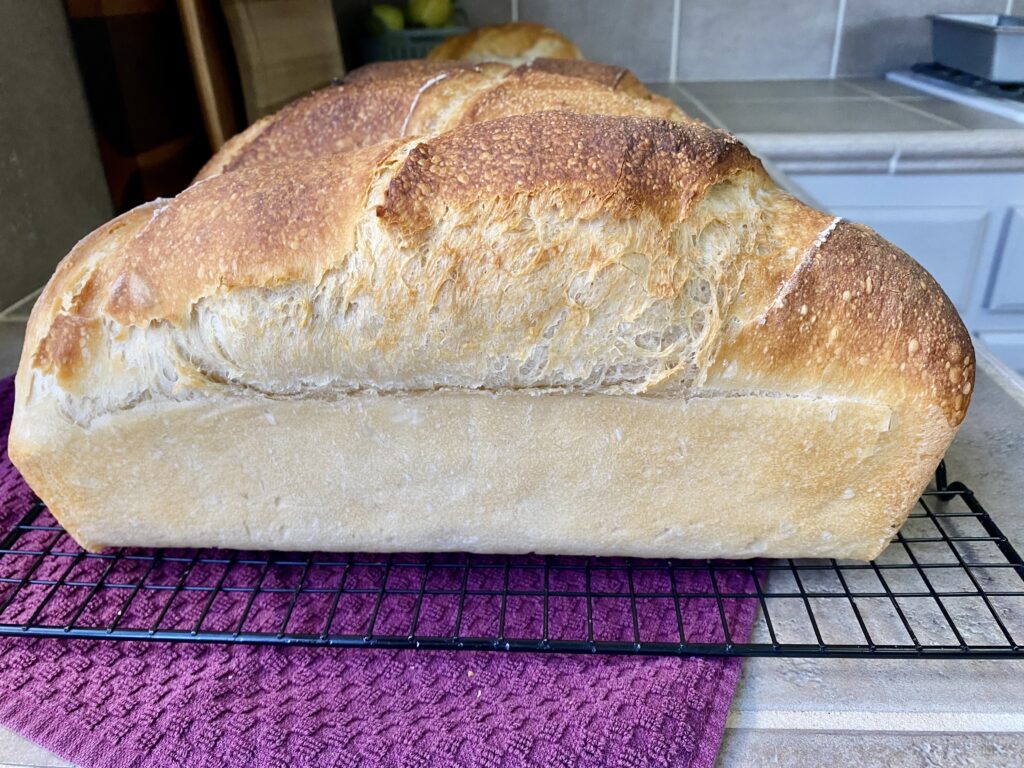
When the timer goes off, pull the bread out of the oven and let it cool for 10 minutes before taking it out of the loaf pans. Allow the bread to completely cool on a wire rack for 4 hours.
You will hear cracking sounds from the bread for a few minutes. Listen as it sings!
Store bread in a bread bag on the counter for 3-4 days, or longer in the refrigerator. Sourdough bread freezes well too and will keep in the freezer for 2 months.
Sourdough Equipment
There are some very fancy tools and equipment people use to make sourdough, but let me show you my simple to use tools. First, you will need a bench scraper. They are very inexpensive and really help during the sourdough process. A kitchen scale is a must when making your sourdough starter and sourdough bread.
If you want large loaves of sourdough, then definitely consider the loaf pans I use, they are the extra-long size.
Bench scrapers I use, linked below:
Kitchen scale I use, linked below:
Loaf pans I use are linked below:
Bread bags I use are linked below:
I prepare my loaves a little bit differently than most people because I use mostly extra-long loaf pans. A lot of people use banneton proofing baskets, but I personally don’t own any. I would prefer using the extra-long loaf pans anyways, they make the most beautiful loaves!
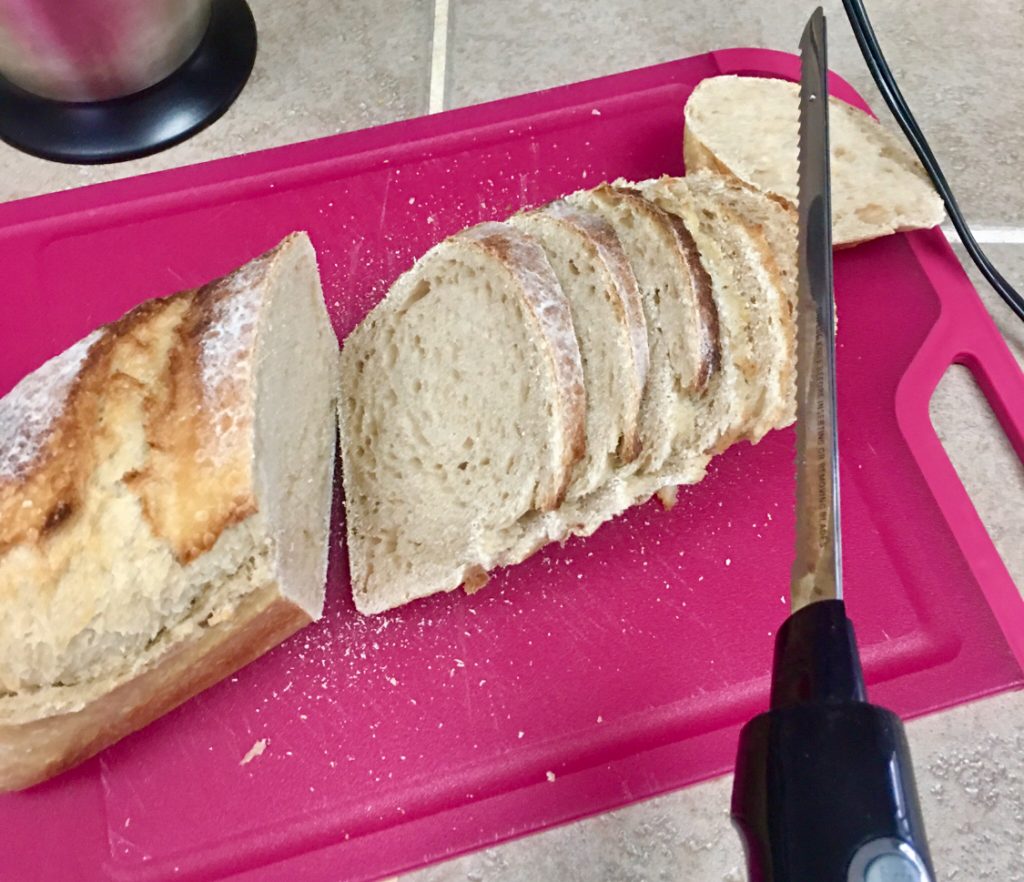
To slice the loaves of bread, we use an electric carving knife. We find that it works best and gives us sandwich size pieces of bread.
If you’ve ever wondered, is sourdough bread healthy? I hope you can see that it is! My goal is for you to feel inspired to create your own loaves of sourdough bread in your kitchen. As you can see, it’s a process and well worth your efforts. Enjoy the experience of making sourdough, and include your family to help you in this adventure, from my kitchen to yours!
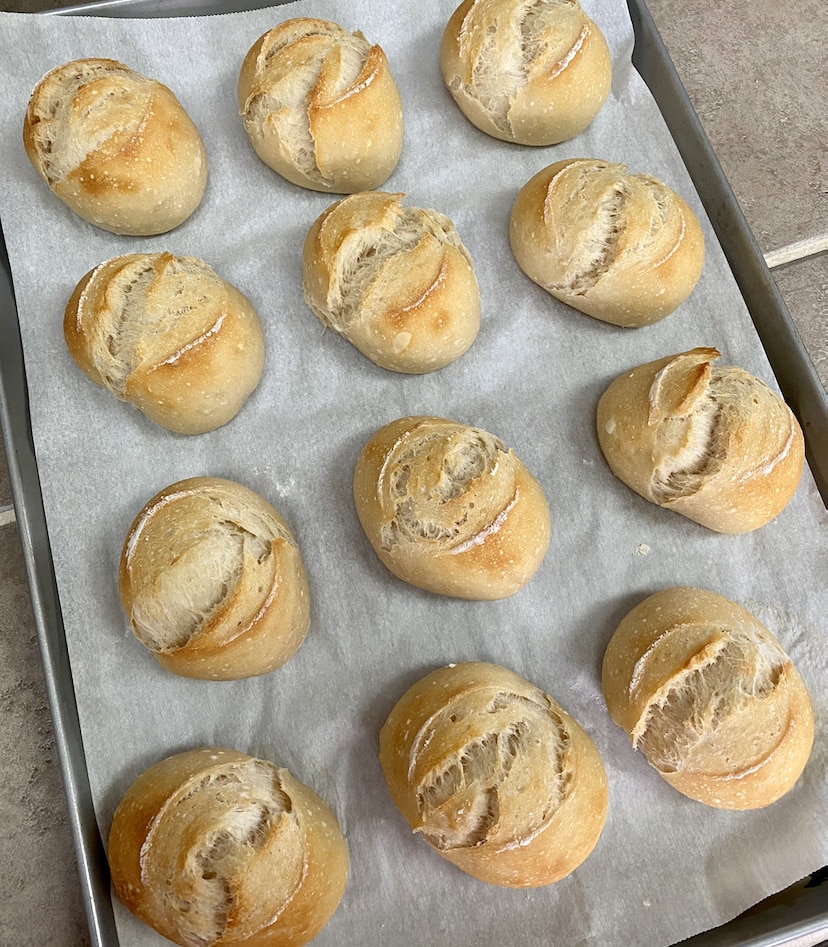
Sourdough Dinner Rolls
To make this sourdough bread recipe into dinner rolls, follow the recipe notes in the printable recipe.
Other Recipes You Might Like:
- Oat Flour Gluten Free Brownies
- Healthy Candied Sweet Potatoes
- Taco Casserole (Plant-Based)
- Easy Broiled Banana Dessert
Sourdough Bread
Ingredients
- 320 grams sourdough starter
- 630 grams lukewarm water
- 1020 grams flour
- 24 grams salt
Instructions
- First, prepare your starter days in advance. Make sure your starter is active. Discard will not work.
- Place a large mixing bowl on a food scale. ZERO out the food scale.
- Add your starter to the bowl. Be as close as you can to the required measurement. One gram over or under is okay. ZERO out the food scale.
- Next, add the water. ZERO out the food scales. Add the flour. ZERO out the food scale.
- Take the bowl off the food scale. (DO NOT ADD SALT YET).
- With your dominate hand, submerge your hand into the flour mixture and make swirling motions to incorporate the dough. This takes some time, so don't worry. Keep wiping your hand around the bowl and underneath to incorporate all the flour. If you hand gets too doughy, dip your other hand in water, then it's easier to get all the dough off your dominate hand.
- Once the flour is all incorporated, get a linen napkin or terry cloth towel totally wet, ring it completely out so it's just damp, drape it over the bowl, and let the dough rest for 20 minutes.
- When the timer goes off, it's time to add the salt with more water. Measure out the salt using your food scale, then sprinkle the salt all over the top of the dough. Fill a jar with water, the mouth of the jar should be wide enough for your hand (You will need to empty and rinse out the jar between each use). Take 2 scoops of water with your hand and pour them over the dough. Make sure both hands are wet, then work the dough to incorporate all of the salt. You want the salt totally dissolved, then you know you're done. If there's a few pieces of salt, it's okay. If the dough feels too dry, add a little more water to the dough. There is no exact measurement for this. It's something you just need to feel. With practice you will get there.
- The dough should now look like cheese curds. Put the damp towel over the bowl again, and set the timer for 20 minutes.
- After the timer goes off, it's now time to start your first round of STRETCH and FOLDS. There will be 4 rounds total of stretch and folds. These are quick and only require about 1 minute of your time.
- Make sure there is fresh water in your jar, then dip your dominate hand inside the water. No scooping water, just get it wet.
- With your wet hand, you are going to start on the NORTH end of the bowl and work counter clockwise. Take your hand and scoop up some dough on the North end, and fold it into the center of the dough. Continue doing this all the way around the bowl. Generally it takes 4-5 stretch and folds to complete the whole bowl.
- Once you have completed your first stretch and fold, set the timer for 40 minutes.
- You will repeat this process a total of 4 times. If your towel starts to dry out, you may get it wet again, ring it out, and place over the bowl.
- After the 4th stretch and fold let the dough rest again for 40 minutes.
- Now it's time to move on to PRE-SHAPING.
- First, we need to divide the dough. The dough itself should way around 2150 grams, give or take, minus the weight of your bowl. We need half of that. So roughly take 1070 grams of dough and place it on a floured surface. Use your bench scraper to help you.
- Starting from the North side, grab the dough and fold it into the center. Now take from the South side and fold that end of dough into the center. Now the sides, then the corners, always working from opposite sides.
- Make sure the underside is floured, but do not flour the top side, or the pieces of dough will not stick to each other.
- The goal now is to create tension on the under side. To do this you pick up the dough and place it on its side and tuck the dough under. Continue this process of tucking the dough all the way around. Now place the dough tucked side down, with the nice smooth side facing up.
- Use your hands to turn the down in a circle cupping the dough with your hands and tucking any loose ends under. (SEE VIDEO FOR A VISUAL)
- Repeat the process with the second half of the dough.
- Place the damp towel over the 2 dough balls and let them rest for 20 minutes.
- When the timer goes off, remove the towel. Using your bench scraper to assist you, and flip the dough over, so the smooth side is now facing down.
- It's time for the FINAL SHAPING, and we're almost done for the night!
- On the North side of the dough, fold down the top piece with your hands about 1/3 of the way down. We are going to now fishtail braid our bread. Take a piece from the left side and fold it into the center. Then, take a piece from the right side and overlap the first piece. Continue this process until you are down and the bottom.
- Lightly flour your hands at anytime if it gets sticky.
- Now it's time to take the bottom piece and fold it up about 1/4 of the way, and roll the dough like a cinnamon roll. I like to roll it tightly and stretch it long to fit nicely in my extra-long loaf pans.
- We use this bread for sandwiches, so I prefer zero big holes. So I roll the bread tightly.
- Now place your bread in your desired loaf pans. (If using metal pans, I recommend lining them with parchment paper.)
- Put your loaves into bread bags, tie them off, and place the loaves in the refrigerator over night. At least 10-12 hours.
- The next morning, pull out the loaves from the refrigerator.
- Preheat your oven to 500 degrees, and place a metal pan filled with water on the lower shelf of the oven.
- While your oven is preheating, you need to score the loaves of bread, or they will look like they exploded in the oven.
- Take a sharp knife, lame, or x-acto knife, dip in flour, then run the knife over the dough in a diagonal line to the bread. I make a top, middle, and bottom slit into the dough. If you don't run the knife over the whole width of the dough, it will bubble weird on the sides, so make sure to run it along the whole width. (There are several ways of doing this process, and many designs you can make. This is how I do it.)
- Once your oven is preheated, place your loaf pans in the oven and shut the door. Lower the oven temperature to 475 degrees, and set a timer for 20 minutes.
- When the timer goes off, lower the temperature to 450 degrees and bake an additional 20 minutes.
- When the timer goes off, pull the bread out of the oven and let it cool for 10 minutes before taking it out of the loaf pans. Allow the bread to completely cool on a wire rack for 4 hours.
- You will hear cracking sounds from the bread for a few minutes. Listen as it sings!
- Store bread in a bread bag on the counter for 3-4 days, or longer in the refrigerator. Sourdough bread freezes well too and will keep in the freezer for 2 months.
Notes
- After your 4th and final stretch and fold, cover the bowl with plastic wrap and place in the refrigerator for the night.
- The next morning, pull the bowl of dough out of the refrigerator and let it sit on the counter for about 1 hour.
- Preheat oven to 450 degrees (about 30 minutes before baking) with a baking dish filled with water on the lower rack.
- Using your bench scraper to take the dough out of the bowl and place it on either a cutting board or silicone mat.
- Measure out about 120g of dough on a kitchen scale, then shape into a dough ball.
- Follow the pre-shaping instructions to do this method.
- Tuck in the bottom to create tension on the top.
- Place each dough ball on a parchment lined cookie sheet about 3 inches apart from each dough ball.
- Cover with plastic wrap and let the dough balls rise for 30 minutes to 1 hour.
- Using a floured knife, slice small slits into the top of each piece of dough.
- Bake in a 450 degree oven for 30 minutes.
Pin For Later!
Aimee,
Excellent!!!! Thank you so much for posting this recipe!!! I also loved your video and it’s so helpful to have. Your love for baking and cooking for your family is infectious! Looking forward to baking my loaves in the morning!
Stefania
Beautiful and so informative!! Ordering all the equipment from your Amazon links and can’t wait to get started♥️
I just made 2 loaves using your method and they are PERFECT! I was skeptical because it seems like a very labor-intensive method but even though there’s a lot of steps they’re all fairly quick and I’ve been trying other recipes for a while to get a perfectly soft loaf and these were just exactly what we wanted! Thank you:)
Thanks for sharing your friend Grace’s recipe with us! I love this easy recipe! Do you put the loaves on top of a cookie sheet as she did?
I personally don’t put them on a cookie sheet. I bake mine in loaf pans.
Does the bread rise in the fridge? Mine doesn’t look like it is. Do I let it rise when I revive it from fridge?
Thank you
Very enjoyable channel 🙂
Hi! I’m sorry for the delayed response, I just moved and haven’t had internet. The bread does actually rise in the fridge over night. If it doesn’t rise to your liking by morning, you can always let it sit out for an hour or so before baking it.
Dear Aimee,
Thank you so much for the video and tutorial on how to make the starter and bread. Very thankful for you! You are a blessing!!
I was so excited during the starter process. It took 14 days for me. And finally made the bread this morning. My loaves out grew the silicone pans I used so I will order the extra long ones you used. Also mine both burned on the tops. Not sure why because I did exactly as the recipe states. Could I lay foil to the top next time and maybe it won’t burn? I know when making pies if you cover the edges with foil they won’t burn.
Any ideas would be so welcomed.
The taste is soooo good! My hubby just couldn’t wait the 4 hours to cool. He cut into it around the second hour.
Thank you again so much!!
got my starter going! do you have any posts on how to keep the starter going once you used what you need for bread? do I just continue to feed the leftover?
Totally up to you. You can put it in the fridge for months, or you can keep it out, feed it and use it. Definitely try the sourdough pizza!
Hi Amy!
We just started our sourdough journey. Do you have a link for your knife?
Yes! It’s on my Amazon shop. amazon.com/shop/eatinghealthyspendingless
My bread is not fluffy or risen after night in the fridge. What did I do wrong?
If your starter is new, that it to be expected. Keep feeding your starter and trying. It’s going to happen 🙂